Considering that epoxy is a durable, rigid, and tough two-part adhesive and protectant, it’s not unusual to wonder whether it’s something you could use on your bathroom floor to protect it against all the water and foot traffic it endures. So, here’s what you need to know about using epoxy on your bathroom floor.
Using epoxy on your bathroom floor will make it visually appealing and create an easy-to-clean surface. Epoxy is slip-resistant, helping to prevent falls and other bathroom accidents. It’s also an antibacterial surface that can help keep your bathroom free of germs.
Now that we know there are numerous advantages to using epoxy on your bathroom floor, let’s look at the details of how to use epoxy and whether you can apply it to the shower floor as well.
Can You Epoxy a Bathroom Floor?
For most people, epoxy flooring is solely applied in industrial spaces, but that couldn’t be further from the truth. Things have changed over time, and epoxy manufacturers have made some major innovative advancements with this polymer material. Today, epoxy flooring isn’t just limited to warehouses and garages.
You can epoxy your bathroom floor as a cover for your existing floor or as your actual floor. The result will be a strong and durable flooring solution that is both water resistant and easy to clean.
Epoxy won’t peel off despite the continuous use of your bathroom. It can also hold up well against chemicals and urine, leaving no room for stains or unpleasant odors.
However, it’s important to have a grasp of what you’re doing before installing epoxy on your bathroom floor. Although applying epoxy flooring doesn’t require any pro skills or sophisticated tools, there are various types of epoxy with individual application requirements.
Using the wrong product on your bathroom floor could end up damaging it, so take care as you proceed.
Is Epoxy Good for a Shower Floor?
Epoxy is also good for your shower floor because it’s durable and non-porous. It has the potential to improve your shower floor significantly. From the aesthetic aspect to ease of maintenance, the list of epoxy’s benefits on your shower floor is endless.
The aesthetic aspect alone has so much to offer, for starters. There are infinite designs you can use on your shower floor, and each one stands out. You can also mix and match colors to get the output you desire.
Epoxy flooring is very easy to customize. You could design your shower floor any way you want it to be. You could make it a mosaic or use whichever material you prefer. Some homeowners even use epoxy to refinish the shower floor, and it turns out great.
Another thing that makes epoxy a good choice for your shower floor is the ease of cleaning. You won’t need harsh chemicals to get rid of dirt and stains because epoxy doesn’t allow them to cling to its surface. Wiping or brushing the floor with mild detergent and then rinsing the floor afterward with clean water will do the trick.
Epoxy is also slip-resistant. It prevents falls, meaning fewer accidents and injuries. On top of that, it contains microbial additives in its mixture that repel microbial growth and keep your shower floor clean and healthy.
Epoxy serves as a long-lasting grout sealer if applied properly, and it creates an impenetrable seal from water. It’s waterproof, in short. Moreover, it won’t be affected by the humidity and temperature in the shower.
Overall, applying epoxy flooring on your shower floor could be an excellent investment in the long run. It will effectively seal the floor and keep it looking good as new for a number of years.
What’s the Best Epoxy for Bathroom Floors?
The best epoxy for your bathroom floor is the Everlast Epoxy, though other epoxy/resin kits on Amazon (like this one) may be a good option for you as well. Everlast’s epoxy is EPA-registered, anti-microbial, mold inhibiting formula naturally prevents the growth of microorganisms, keeping your bathroom floor hygienic and healthy even under extremely wet conditions.
Aside from preventing microorganism growth, Everlast Epoxy flooring offers a seamless, waterproof, and slip-proof surface. This is due to its uniform, troweled-on, resin-rich system that forms a physical bond between the material and the existing bathroom surface, permanently attaching them.
The strong bond between both surfaces ensures no space for water to seep in. Instead, water, chemicals, and other liquids you use on your bathroom floor simply wash down the drain.
Everlast Epoxy is strong, tough, and flexible, unlike many other epoxy floorings. Additionally, it’s available in several colors allowing it to sync with any decor and become part of any bathroom.
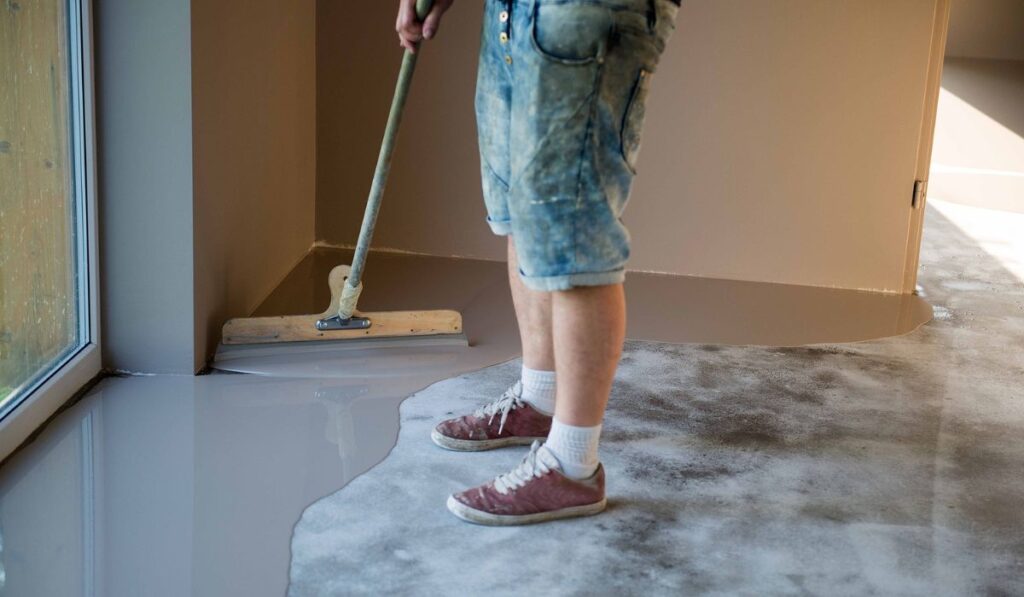
How Do You Apply Epoxy to Bathroom Floors?
Applying epoxy to your bathroom floor is a relatively straightforward task. Keep in mind that it isn’t a good idea to use epoxy directly on your bathroom tiles. Use it on the grout lines, instead. Here’s how to apply the epoxy properly:
Step 1: Prepare the Area and Gather the Supplies
First off, when prepping the area, ensure the bathroom is warm. Epoxy won’t dry and cure in a cool room. Gather all your tools and have them on hand as you’ll need to work quickly and efficiently. You’ll require your epoxy grout, a trowel (on Amazon), vinegar, a sponge, and scraping sticks. Clean your bathroom thoroughly and let it dry.
Step 2: Mix the Grout
Follow the manufacturer’s instructions on the packaging when mixing the epoxy. Epoxy is a two-part mix. Once you’ve mixed it, it should be soft and easy to spread.
Step 3: Spread the Epoxy
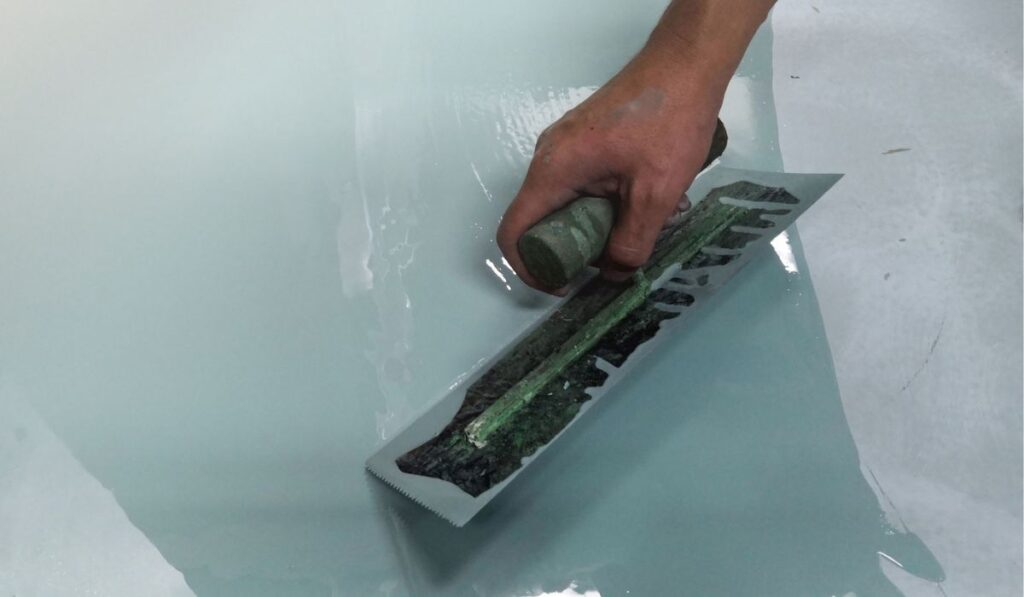
Damp your sponge and have the water close in case you need to dampen your sponge again. Start spreading the grout over a tiny area of the tiles. Use the scraping sticks to smooth the grout lines.
Wipe the excess grout off the tile portion using the damp sponge as fast as possible, leaving it in the grout lines only. Have a friend help you out on this part of the task to improve the efficiency and also reduce the amount of grout that will inevitably remain on the bathroom tiles.
Mix vinegar with water and use it to scrub away the haze. You might not get all of it the first time, so you’ll have to scrub a few more times.
Step 4: Keep Spreading the Grout As You Go
Continue covering the grout lines with epoxy in small sections until you complete the entire bathroom. Once you’re done, examine your work and clean off any unsightly marks or chunks of grouts you may have missed. Soaking them up with a little water and scraping should get them out in a flash.
Step 5: Cure the Floor Before Use
Always check the instructions for curing on the epoxy packaging. Remember, most epoxy resins take around seven days to cure and become completely waterproof. Don’t get too hasty and test your new bathroom floors earlier, or all your hard work will be in vain.